2. User Interface
When opening a project in Cinecred, the project window pops up with four panels by default (Toolbar, Still Preview, Log Messages, Styling). Besides, there are additional panels for performing specific tasks (Video Preview, Delivery). You can show and hide each panel via the buttons in the toolbar.
Still Preview
But first, let’s focus on the still preview of your credits.
Sometimes it’s hard to visualize how the layout falls in place. To this end, Cinecred adds helpful layout guides to this preview, which you can of course turn off for an unobstructed view. Hovering over the toggle brings up the following legend:
- — Page runtimes & card screen bounds
- — Spines
- — Body cells
- — Maximum whole body width
- — Head and tail bounds
If you need to conform to safe areas or ensure that your credits fit inside a 16:9 or 4:3 crop, use the corresponding buttons in the dropdown menu to enable overlays:
Further, you can add custom overlays in the preferences tab in the welcome window. Choose between a custom aspect ratio crop, a set of custom horizontal and vertical helper lines, and a custom image that is laid over or under the preview:
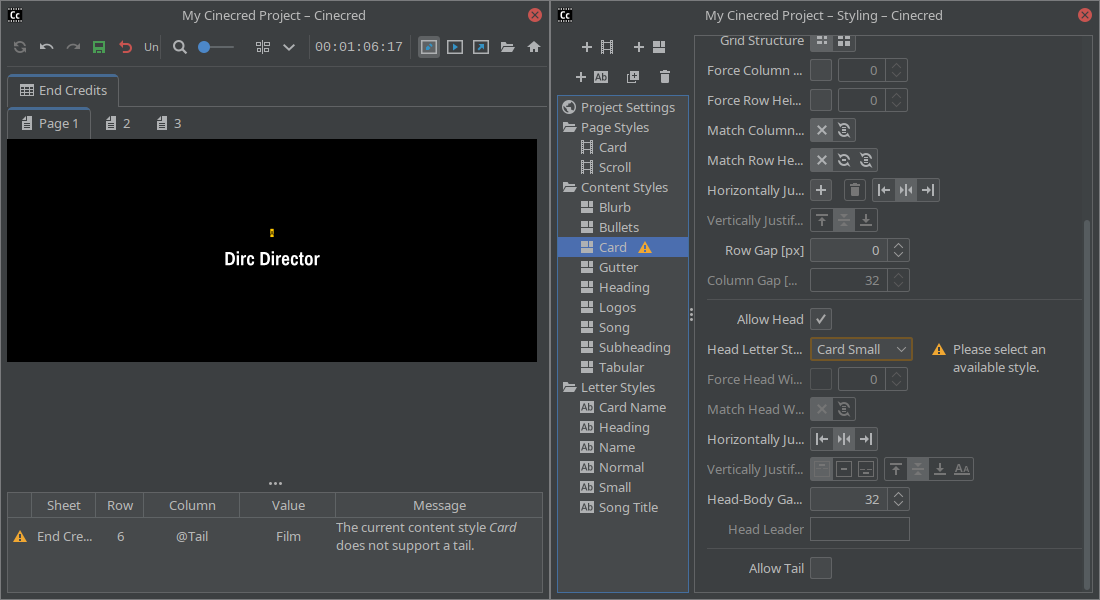
Styling
The styling panel lets you edit the project settings as well as the page, content, and letter styles. Click on a style in the list to edit it. Click on one of the plus buttons above to add a new style, or the trash button to delete any style. Use the save button in the toolbar to save your changes. There, you’ll also find undo and redo buttons.
And if you’ve styled yourself into a corner, use the load last saved button to revert all your changes. The current styling will be retained as an undo state.
By default, the styling panel occupies the right side of the screen. We advise you to snap the spreadsheet editor to the same place. This way, you can use the styling panel button to switch between the styling panel and the spreadsheet editor while working on your project.
Video Preview
At any time, you can open the integrated video preview panel to watch your credits in action. You may use the familiar JKL shuttle keys to play at varying speeds. It’s also possible to toggle full screen or 1:1 actual pixel size playback.
Cinecred can also play out the preview to DeckLink cards. If one is detected, DeckLink buttons are added to the playback controls, and a handy secondary control bar appears in the toolbar. Click the gear to select a line and to configure the playout stream, then click the connection button to start the playout. The configuration will be memorized on restarts.
Delivery
When you’re ready to export, you’ll find manifold delivery options in the delivery panel. Aside from ProRes, DNxHR, and CineForm video, various image sequence formats and H.264/H.265 previews are available. Or just export stills of title cards and entire scrolling sections as PDF or images for your colleagues to check. If you embedded videos, you may also export a csv/edl/otio/fcpxml/xml timeline of their audio to precisely align it later in finishing.
Some formats directly support a transparent background via the Render transparent image option in the Transparency menu, which is handy if you intend to use the credits in compositing. For other formats, you can export the isolated alpha channel as a grayscale matte via the Render transparency matte option.
If you need a higher or lower resolution or higher frame rate version of your credits, use the resolution and frame rate multipliers. In addition, you may force an arbitrary resolution, which just crops or “uncrops” the video.
Some formats support interlaced output. You can choose the field order in the Scan menu. Notice that the fields will really be sampled at double the frame rate. For example, if the scroll speed is 4 pixels per frame, the credits will advance by 2 pixels each field.
If you are not familiar with color spaces, the default settings are likely the right choice. For advanced users, Cinecred offers a wide range of gamuts, EOTFs, and YUV matrices. Please refer to the color management page for details.
The destination filename is usually generated via a delivery destination template, which assembles the filename from properties like the project name or the exported FPS. A few of these templates are included, and you can add custom ones. Unless the template specifies an absolute path, you get to choose the destination folder in the delivery panel.
Alternatively, you can also forego templates entirely and specify the destination file manually by selecting Custom.
Warnings and Errors
Naturally, mistakes happen. When something’s wrong in the spreadsheet, Cinecred shows a warning in the log messages panel. These warnings also establish some context to help you solve the problem.
In contrast, when something’s wrong with the styling, Cinecred shows a warning directly next to the problematic setting in the styling panel.
Window Layout
Cinecred’s user interface is highly flexible and allows you to freely rearrange panels by dragging them around. You can also undock panels by dropping them outside the window, and even dock additional panels inside the new secondary window. This can be especially useful on multiple screens.
Notice that to rearrange panels, you first need to deselect the lock button.
The top-level split in a window has a special capability: when all panels on one side (e.g., the right side) are hidden, the entire window can retract and thereby reveal other windows on your computer. In the default window layout, this is used to easily switch between the styling panel and the spreadsheet editor. To define which sides of a window can retract, use the little arrow buttons in the window’s corners.
Besides the default single window layout, Cinecred ships with a second one where most panels are undocked into their own floating windows.
Once you’re happy with your own window layout, you can save it, load it later using the dropdown, or even set it as the default for freshly opened projects. Notice that custom window layouts remember the exact screen where each window was placed.